To do Bulgarian split squats at home, place one foot on a stable surface behind you, keep the other foot far enough forward to squat comfortably, lower under control, and drive through the front foot to stand. Start with body weight and support yourself with a wall or chair until your balance and range of motion are consistent.
This single-leg exercise can train the quadriceps, glutes, hamstrings, and stabilizing muscles without requiring a squat rack. The challenge is not simply getting into position; you also need a secure setup, suitable depth, controlled knee tracking, and a progression that matches your current strength.
This guide explains how to do Bulgarian split squats at home, how to adjust the exercise for your proportions, what to do if your balance is poor, and when discomfort suggests that you should stop or seek professional advice.
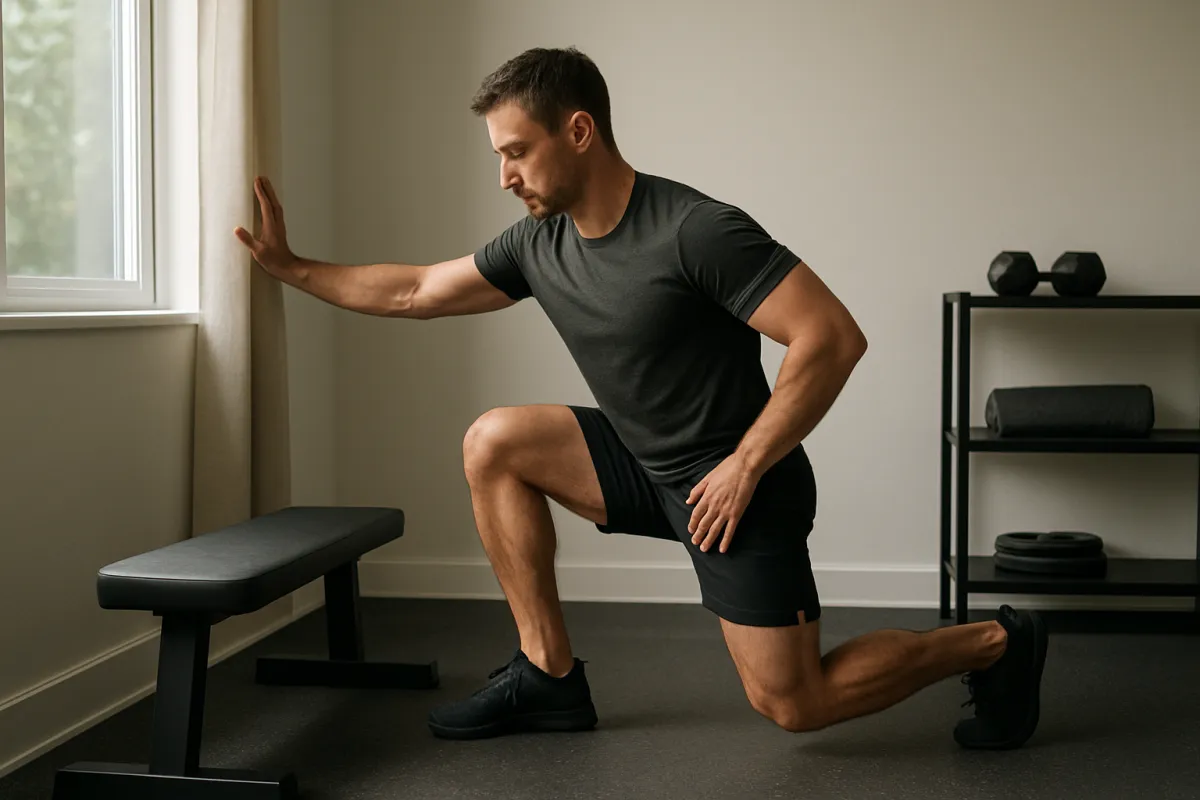
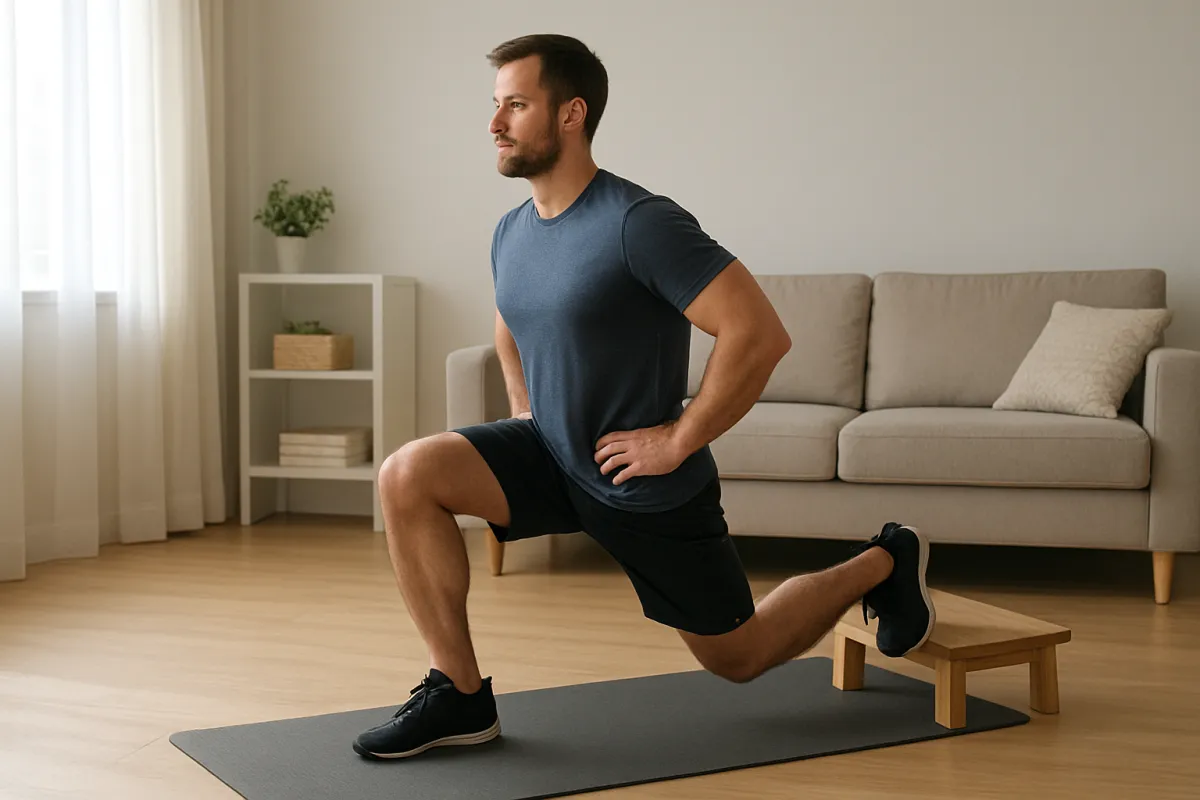
1. Prepare a safe home setup
Choose the support for your rear foot before you begin. A low, stable bench or exercise step is usually easier to control than a tall chair. The surface should not slide, tip, fold, or roll when you place body weight on it.
Clear enough space for your front foot, hips, and arms. If your floor is slippery, exercise in shoes with a secure grip or place the support on a non-slip surface. Keep a wall, countertop, or sturdy chair within reach during your first sessions.
Equipment options
- Best starting option: body weight and a wall for balance.
- Useful rear-foot support: a low step, firm bench, or stable sofa edge.
- For progression: dumbbells, a kettlebell, or a loaded backpack held close to your body.
- For extra comfort: a folded exercise mat under the rear knee area, without placing it under an unstable support.
Strength and balance work can be useful at home, but the exercise should match your current ability. General guidance from the NHS strength and flexibility guidance supports gradual progression rather than forcing difficult movements immediately.
2. Find your starting stance
Stand in front of the support with your feet roughly hip-width apart. Step one foot back and place the top of that foot on the support. Your front foot should be far enough forward that you can lower without your front heel lifting or your knee collapsing inward.
There is no single perfect distance for every person. Leg length, ankle mobility, hip comfort, support height, and the amount of forward knee travel all affect the stance. Begin with a shorter range of motion and adjust one variable at a time.
Use this stance check
- Keep most of your weight over the front foot.
- Allow the rear knee to bend naturally rather than pushing your rear hip forward.
- Keep the front heel and the base of the big toe connected to the floor.
- Point both knees generally in the same direction as the toes.
- Use a light fingertip hold if you cannot balance without twisting.
Perform two slow practice repetitions on each side. If you feel cramped at the bottom, move the front foot slightly forward. If you feel an excessive stretch in the rear hip or the front heel rises, reduce the depth or lower the rear-foot support.
3. Perform the Bulgarian split squat step by step
- Set your posture. Stand tall with your ribs stacked over your pelvis. Keep your gaze on a fixed point ahead of you and brace your midsection gently.
- Load the front leg. Shift your weight toward the front foot. The rear foot is mainly there for balance and should not dominate the movement.
- Lower slowly. Bend the front knee and hip while allowing the rear knee to move toward the floor. Descend for about two to three seconds.
- Keep the front knee controlled. It may travel forward over the toes if this is comfortable, but it should follow the direction of the toes rather than falling inward.
- Stop at your current comfortable depth. You do not need to touch the rear knee to the floor. Stop before your pelvis tucks sharply, your balance breaks, or you feel joint pain.
- Pause briefly. A short pause can help you check that your front heel remains grounded and your torso is stable.
- Stand through the front foot. Push the floor away using the whole foot, especially the heel and midfoot. Straighten the front leg without snapping the knee backward.
- Complete the set. Finish all repetitions on one side or alternate sides, depending on which method lets you maintain better control.
NASM describes the movement as a unilateral lower-body exercise with the rear foot elevated and emphasizes controlled mechanics. You can review its Bulgarian split squat exercise library entry as an additional form reference.
Use the following checkpoints during your first set:
| What to look for | Warning sign | Adjustment |
|---|---|---|
| Front foot stays flat | Heel lifts during the descent | Move the foot slightly farther forward or reduce depth |
| Knee follows the toes | Knee drops inward | Use a lighter range and press the knee gently toward the second or third toe |
| Hips remain mostly square | Pelvis rotates toward one side | Hold support and reduce the stance length |
| Torso stays controlled | You fold forward or arch aggressively | Brace lightly and use body weight only |
| Rear leg assists minimally | You push strongly from the back foot | Shift more weight to the front leg and slow the lowering phase |
4. Choose repetitions, sets, and rest
For a first session, try two sets of five to eight controlled repetitions per side. Rest for about 60 to 120 seconds between sides or sets, using longer rest if your balance deteriorates or your breathing has not settled.
Your final repetitions should be challenging but technically similar to your first repetitions. If you must bounce from the bottom, use your hands to pull yourself upright, or repeatedly lose balance, the set is too difficult in its current form.
A practical progression is:
- Stage 1: supported split squat with the rear foot on the floor.
- Stage 2: body-weight Bulgarian split squat while holding a wall or chair.
- Stage 3: unsupported body-weight repetitions.
- Stage 4: slower lowering, a brief pause, or a slightly deeper comfortable range.
- Stage 5: light external resistance, increased gradually.
Progress only one main variable at a time. For example, do not increase depth, weight, repetitions, and tempo in the same workout.
5. Modify the exercise for common difficulties
If your balance is poor
Hold a wall with one hand or place a chair beside you. Balance support is not cheating; it allows you to train the leg muscles instead of spending the set trying not to fall. You can also lower the rear-foot support or return temporarily to a regular split squat.
If your front knee feels overloaded
Reduce the depth, move the front foot a little farther forward, and slow the descent. Check that the front foot is not turning inward and that you are not dropping suddenly into the bottom position. If pain persists, stop the exercise and choose a more comfortable variation.
If your rear hip feels uncomfortable
Use a lower support and avoid forcing the rear knee toward the floor. A narrow stance or excessive effort to keep the torso perfectly upright can make the rear hip feel compressed or stretched. Test a slightly longer stance and a small forward torso lean while keeping the spine controlled.
If you cannot reach much depth
That is acceptable at the beginning. Use a partial range that remains stable, then gradually increase depth as control improves. Depth should be earned through consistent, comfortable repetitions rather than forced through joint discomfort.
6. Avoid the most common mistakes
- Using a tall or unstable support: A higher surface does not automatically make the exercise better. It often increases balance demands and may irritate the rear hip.
- Starting with heavy weights: The exercise is already demanding because it is single-leg and balance-dependent. Learn the pattern with body weight first.
- Standing too close to the support: This can force the front heel to lift or make the front knee travel sharply forward.
- Keeping the front foot too far away: This may turn the movement into an uncomfortable stretch and make it difficult to lower vertically.
- Pushing from the rear foot: The back leg should provide only as much assistance as needed for stability.
- Rushing the descent: Dropping quickly reduces your ability to correct balance and control joint position.
- Comparing left and right sides by feel alone: Start with the weaker or less coordinated side and match the stronger side to it.
7. Use pain and safety checkpoints
Muscle effort, mild stretching, and temporary fatigue can be normal. Sharp pain, a catching sensation, sudden swelling, numbness, dizziness, or pain that changes your walking pattern is a reason to stop. Do not try to “push through” symptoms that feel like an injury.
Guidance from NHS physiotherapy services recommends progressing gradually and avoiding exercises that make pain worse each time or leave you significantly worse afterward. The NHS exercise information hub also provides general advice on choosing activity safely.
Seek advice from a qualified clinician or physical therapist before adding this exercise if you have a recent knee, hip, ankle, or back injury, significant balance problems, or a medical condition that affects exercise tolerance. Stop immediately and seek urgent help for chest pain, fainting, or severe shortness of breath; NHS Inform includes these as reasons to stop exercising and obtain medical attention.
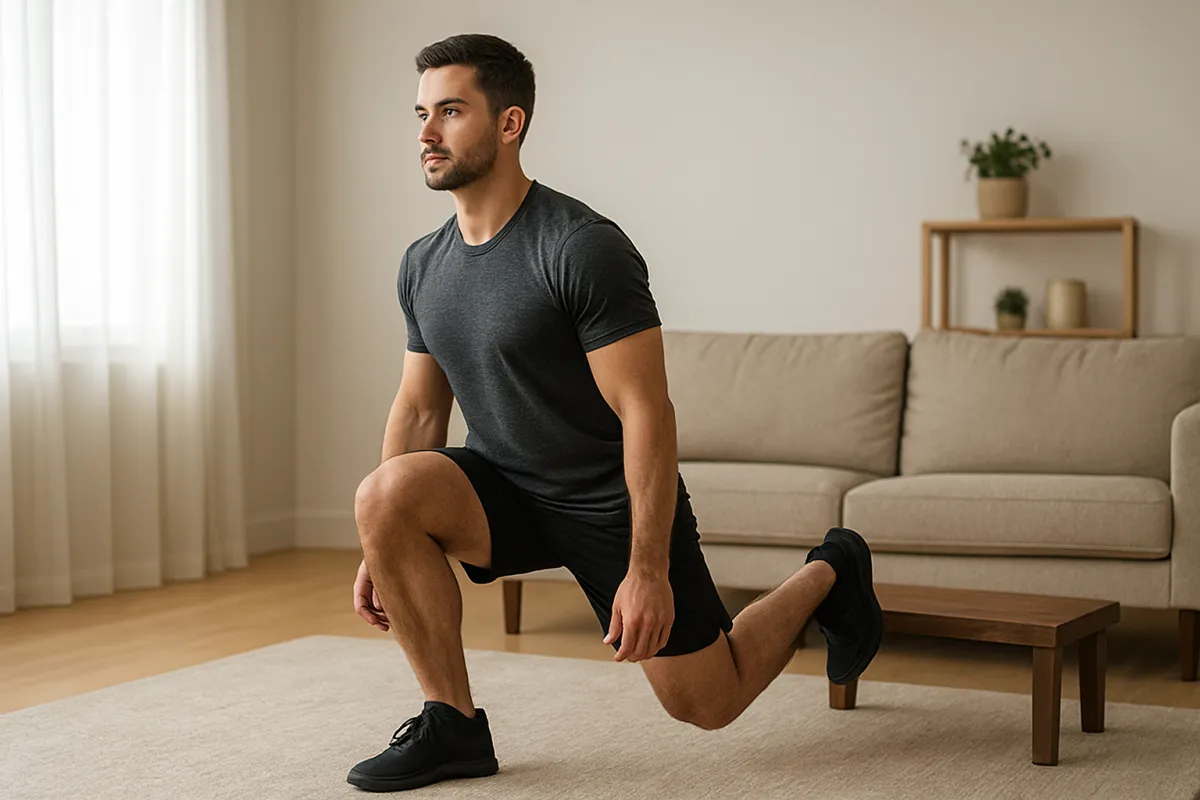
8. Add resistance only when your form is repeatable
Once you can complete your planned body-weight sets with stable balance, consistent depth, and no concerning symptoms, hold a light dumbbell in each hand or one weight close to your chest. Keep the load modest enough that you do not need to lean, twist, or use the rear leg to finish repetitions.
For home workouts, a loaded backpack can work, but secure the contents so they do not shift. Avoid placing a heavy backpack high on your shoulders unless you have excellent balance and a clear reason to use that variation.
When increasing resistance, add a small amount and keep the same repetition target. If your form changes noticeably, return to the previous load and build more control before progressing again.
9. Build Bulgarian split squats into a home workout
Bulgarian split squats can appear after a warm-up and before high-fatigue conditioning. A simple lower-body session might include a squat or hinge pattern, Bulgarian split squats, a hamstring exercise, and calf or core work.
Complete five to ten minutes of general movement first, such as marching, easy cycling, or body-weight squats. Then perform a few practice repetitions before your working sets. If you are also jumping rope, place the split squats before intense jumping so fatigue does not compromise balance; you can compare home equipment options in our guide to the best jump ropes for beginners.
Allow enough recovery between hard lower-body sessions. Soreness is not a requirement for progress, and repeating the exercise while your movement is still noticeably impaired can make technique harder to assess.
Actionable checklist before your next set
- Is the rear-foot support firm, low enough, and non-slip?
- Can you reach the support without twisting or overreaching?
- Does the front heel stay down during a practice repetition?
- Does the front knee track in the same direction as the toes?
- Can you lower and rise without bouncing or pushing hard from the rear leg?
- Do you have a wall or chair nearby if balance becomes difficult?
- Are you using a range and load that do not produce sharp or worsening pain?
What if your Bulgarian split squat still feels wrong?
What if one side is much weaker?
Begin with the weaker side, record the number of clean repetitions, and perform no more on the stronger side. Use support so the difference reflects leg strength and coordination rather than balance alone.
What if your legs shake?
Shaking can occur when the muscles are working hard or when balance is unfamiliar. Reduce the repetitions, rest longer, hold support, and stop if the shaking is accompanied by dizziness, pain, or loss of control.
What if you feel the exercise mostly in your front thigh?
That is common. A slightly longer stance and modest forward torso lean may shift more work toward the glutes, but do not force a new position if it causes hip or back discomfort. The exercise will always involve several lower-body muscles rather than isolating one area completely.
What if the rear foot position is uncomfortable?
Try placing the top of the foot on the support rather than balancing on the toes, lower the support, or use a regular split squat with both feet on the floor. The elevated version is optional; it is not worth using if the setup distracts you from controlled movement.
Next actions
- Choose a stable support no higher than needed for comfort.
- Practice the stance with no weight and use a wall for balance.
- Complete two controlled sets of five to eight repetitions per side.
- Review the checkpoint table and correct only one form issue at a time.
- Repeat the exercise once or twice weekly before considering added resistance.
If you are building a complete home routine, pair this movement with an upper-body progression such as improving push-up strength at home, and use recovery strategies such as the practical comparison in our guide to foam rolling versus stretching.
The best way to learn how to do Bulgarian split squats at home is to make the setup stable, choose a comfortable stance, and repeat the same controlled pattern before chasing heavier weights or greater depth. If you can keep your front foot grounded, your knee aligned, and your balance under control, you have the foundation for steady progression.